Table of Contents
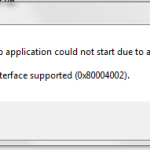
You may find an error code indicating an acute ar-153 patch. There are a number of steps you can take to fix this issue and we’ll cover that in a moment.
PC running slow?
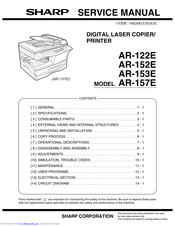
TROUBLESHOOTING THE DEVICE
TROUBLESHOOTING

If a problem occurs, check the following list before contacting SHARP Customer Service
Squad trials? Remove stuck parts of the map.
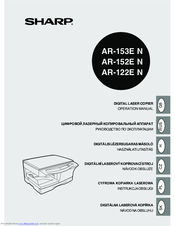
USER MANUALDIGITAL LASER COPIERDDIGITAL LASER COPIERGBAR-153E NAR-152E NAR-122E NDIGITAL LASER COPIERFUSER GUIDEDIGITAL COPIEREMODE to lose JOBDIGITAL LASER COPIERINSTRUCTION MANUALSI amUSER MANUALCLASSIFICATION OF A SPECIFIC LASER PRODUCTVAROITUS!MILKTIEN KAITTEMINENMUULLA QUEEN TASSKÄYTTÖOHJEESSA MAINITULLATAVALLA SAATTAA ALTISTAAKEITTAYANTOURVALLISUUSLUOKAN 1YULITTAVALLENYAKYATTOMELLELASER PARTS.CLASS 1 LASERLUKOAN 1 MILK LASERCLASSIFICATION OF A SINGLE LASER DEVICEWARNINGOM APPARATUS ANVÄNDS PÃANNAT AN sitting AND DENNABRUXAVISNINGSPECIFICATIONS, CANANVENDAREN UTSATTAS FOROSINLIG LASERRADIATION,SOM ÖVERSKRIDER GREENSFOR CLASS 1 LASER.laser rayLASERSTRÔLING NÔR DEKSEL ÅPNES OG SIKKERHEDSLÅS BRYTES.LASER RADIATION DURING OBSERVATION AND OPENING OF LOCKS.CAREFULLY INVISIBLEUNNGÅ EKSPONERING FOR STRÅLEN.UNWANTED USINLIGAVOID RADIATION.OSYNLIG LASERSTRÔLNING NÄR DENNA DEL ÄR ÖPPNAD OCH SPÄRRAR ÄRINVISIBLE LASER RADIATION WHEN COATING ANDATTENTION! UNLOCK SAFETY BLOCKOUTDATED. DO NOT EXPOSE THE BEAM. WARNING URKOPDRAWER. STRÁLEN ÄR FARLIG. BETRAKTA HEY STROLEN.AVATTAESSA JA SUOJALUKITUS OHITETTAESSA OLET ALTTIINA NÄKYMÄTÄNTÄUSYNLIG LASERSTRÃ…LING VED Ã…BNING, NÃ…R SIKKERHEDSAFBRYDERE ERADVARSEL ude LASER SEED PARTSvaro!.ÄLÄ KATSO SÄTEESEEN.AF FUNCTION. UNDGA UDSAETTELSE FOR STRÖLING.1LASERPRODUCT classCLASS 1 LASERcautioncautionWarningThis product contains the best low power laserDevice. To ensure continuous coverage, do not do thisRemove all covers or try to gain accessin option. invite everyoneQualified service personnel.This product with less powerEquipped with a laser scanner. For your safety, do not remove coversand do not try to touch the internal parts.Maintenance work must bebe completed only by trained professionals.This product is a device that outputs contentlow power laser. Forsafety, the belayer does not remove the cover, norgain access to the inside of the product.fix, turn to a strange personQualification.preventionDangerEste producto viene provisto de unBaja Potencia fractional laser skin device. Chapterguarantee the safety of su dentro de todo momento,not quite ninguna tapa and don't intend to access allInterior Design. Consult personallytechnique el calificado cualquier Problema deService.Questo contiene prodotto us device allow power laser. Pro Motivi ofsicurezza non si deve smonare il on the road all interno peraccessory. SydneyrepaircompeteapersonallyQualification.CAUTIONWarning sign on the corresponding deviceSticker () when all zones are armed, the device displays the following:: Caution - danger: Caution hot surfaceUsage NotesPlease observe the following precautions when using this particular device.Warning:• The welding area is hot. Check for paper jams in this area.• Do not look directly at the light source. This may damage your eyes.• Do not turn the device on or off as soon as possible. After turning off the machine, wait 10-15 seconds before spinning.before it turns back on.• The machine must always be powered off before installing consumables.Caution:• Place the device on a solid, level surface.• Do not install the device in a safe, damp or dusty place.• If the tool is not used for a long time, such as during successive holidays, simply turn itturn off the power switch and unplug the power cord from the outlet.• When moving the future device, be sure to turn it off and unplug the power cordthis reception.• Do not cover the device with a dust cover or plastic film when it is turned on. can doTherefore, avoid heat radiation, which can damage the device.• Use of controls or settings or performance in connection with procedures other than those specifiedhere pThe solution may be hazardous if exposed to radiation.• The outlet must be installed near the equipment and be easily accessible.important when choosing an efficient installation siteDo not install the device in the following places:• Humid, damp, or very dusty• expose to direct sunlight- poorly ventilated• Are located under extreme temperature or humidity control, such as near an air conditioner orHeater.It is best to connect only the power cord and outlet that meet your specifications.voltage current and requirements. Also make sure the outlet is properly grounded.Plug the oven into an outlet not normally used for other electrical equipment.Technics. If the light hook is plugged into the same socket, you will see the lightmay flicker.Make sure there is enough space around themMachine for maintenance and normal ventilation.20cm10 centimeters10 centimetersoneHandling instructionsTo maintain the performance of this device, be careful when handling the followingmanner.Do not drop the house, hit it, or strike it against objects.Store replacement toner cartridges in a cool, dry place without removing them.packaging before use.• Exposure to direct sunlight or heat may result in excessive copies that may not be optimal.Do not touch any of our photoconductive drums (green part).• Scratches or smudges on the drum itself will make copies dirty.Laser Precautionswavelength770nm - 795 times11 nmImpulse.82 µs / 7 mmoutput power0.17mW±0.01mWProper storage of consumablesStore toner consumables (paper and cartridges) in an environment that:• clean and dry• at the right barn temperature• Keep away from direct sunlight. Paperstore in a package and sleep in an apartment.• Paper stored loose, also known as end wrap, may become sticky or damp.causing a paper jam.Brand recognition• Microsoft and Windows are US trademarks of Microsoft Corporation andother countries.• IBM and Are pc/at aretrademarks of International Business Machines Corporation.• Adobe and Acrobat are artistic logos for Adobe Incorporated systems.• All other graphics and copyrights are the property of their respective owners.As an ENERGY STAR® partner, SHARP has recognized thisThis product meets the ENERGY STAR® energy guidelines.Efficiency.In some regions, the dedicated POWER switch is marked with an "I" followed by an "O" on the copier.instead of "ON" also "OFF".The symbol "O" indicates that the copier is, of course, not completely turned off, but is in some kind of waiting state.The state in this position of the "POWER" switch.If your copier is so marked, please read "I" for "ON" and "O" for "OFF".Caution!To turn off the electricity, remove the plug from the socket.The outlet must be installed near the materials and be easily accessible.accessible.2CONTENT1. INTRODUCTIONHOW TO USE THE MANUAL .............................. 4PARTS IDENTIFICATION ............... 5CONTROL PANEL ........................... 62 LOAD PAPERPAPER.................................................... 7LOADING THE PAPER TRAY ...... 8BYPASS POWER (includingpaper) ............................... 103 MAKE COPIESCOPY STREAM .................................................................. ...... .. thirteenPOWER CABLE CONNECTION 14origin ............LE 16Setting the COPY VOLUME .............................. 18EXPOSURE ADJUSTMENT/COPYING ............................................... 18REDUCTION / INCREASE /ZOOM ............................................... 204 FUNCTIONSSPECIAL DESCRIPTION SPECIALFUNCTIONS ................................. 21TONER SAVE MODE .............................................. 21USER PROGRAMS..............................22SHOW TOTALCOPIES ................................................. ............... 235 MAINTENANCEINK CARTRIDGEEXCHANGE.............................. 24TONER LIFE ....................................... 26CLEANING THE DEVICE.... TROUBLESHOOTING 276 BLOCKTROUBLESHOOTING ...............29STATUS INDICATORS...................30REMOVING JAMFED FEED ..............................................31DEVELOPER WANTED ...........35REQUIRED MAINTENANCE........35HEAD LOCK SWITCH 36one27 ADDITIONAL EQUIPMENT (AL-12PKM)SOFTWARE FORSharp MFPPERSONAL SERIES ...................37HARDWARE AND SOFTWAREREQUIREMENTS ................................38BEFORE INSTALLATION ....................................38INSTALLING THE SOFTWARE ......40ADVERTISING ONCONTROL PANEL ...............................50USING THE PRINTER MODE .............................51USING THE SCAN MODE ....53HOW TO USE THE LINEMANUAL .............................. 61INSTALLS WITH OTHERSDRIVER ............................. 63LOGIN INTERFACECABLE ................................... 648 OPTIONS FOR AR-153ENSYSTEM Setup ..............................66SINGLE PASS FEED MATERIAL (AR-SP5) .......... 66250-SHEETS PAPER FEEDER(AR-D16).................................679 APPENDIXTECHNICAL SPECIFICATIONS .............................. 68ABOUT ACCESSORIES AND OPTIONS... 71INDICATOR................................................. 72SOFTWARE LICENSE .........................................753456Seven8th93oneINITIATIONThis chapter contains basic information about using the device.HOW TO USE THE MANUALThe user manual contains explanations for optimal operation of the device, importantProtection Considerations and Procedures. Please make the most of your deviceread the user manualoperation. Keep your user manual handy Improve the speed of your computer today by downloading this software - it will fix your PC problems.Помогите исправить ошибку Sharp Ar-153 при устранении неполадок
Hilfe Bei Der Behebung Des Sharp-Fehlerbehebungsfehlers Ar-153
Ayuda A Solucionar El Error De Solución De Problemas De Sharp Ar-153
Aide à Corriger L'erreur De Dépannage Sharp Ar-153
Ajude A Corrigir O Erro De Solução De Problemas Da Sharp Ar-153
Aiuta A Correggere L'errore Di Risoluzione Dei Problemi Di Sharp Ar-153
Sharp 문제 해결 오류 Ar-153 수정에 도움
Hjälp åtgärda Sharp Felsökningsfel Ar-153
Pomóż Naprawić Błąd Rozwiązywania Problemów Z Sharp Ar-153
Help Bij Het Oplossen Van Sharp-probleemoplossingsfout Ar-153